10.22.2009

Skinny Wild Wings


I was on the hunt for some new recipes and came across this:
Kristen's Buffalo Chicken Bites

Perfect! My husband would love having wings for dinner. While most would prefer the boneless, not my husband. I knew that I needed to make them as close to Buffalo Wild Wings to satisfy him! Yes, I skinned those tiny drummettes. Did you know that BW3s sells their sauces? We bought some when I was pregnant because I was craving wings but wanted something at home that was a little healthier. I would just put it on any chicken. It has become a staple condiment around here.

As you can see I served them with veggie sticks, watermelon and oven crunch fries. The fries I made just like Seasoned Baked Potato Wedges but I peeled and cut the potato into fries.

Sorry about the cell phone picture!


Skinny Wild Wings
Serves 4
Serving Size - 6 wings/drummettes
6 pts (about 1 pt a wing)

24 chicken drummettes or wings
1/2 c flour
1/4 t cayenne pepper
1/4 t paprika
1/4 t garlic salt
Pam Spray

Skin wings or drummettes. Wash and pat dry. Mix dry ingredients together in a gallon Ziploc bag. Add chicken and toss to coat. remove chicken and place on plate in fridge for at least 2 hours. (I let them sit all day!) This uses the juices from the chicken to create a slight breading and helps the chicken crisp.

Bake 350 for 35 min. (I baked mine on a cooling rack over a baking sheet so that they would be out of the juices and crisp up, similar to frying. Spray each piece with Pam and return to a 375 oven for 5 - 10 more minutes to crisp. Toss in your favorite wing sauce. (I counted the sauce separately because it depends on how much you like and what kind you use. Half were in mild and the other half in honey BBQ. A little sauce goes a long way. Mine was only an extra 1 pt.)

10.19.2009

Homemade Meatless Crumbles

I love Morningstar products but they are so so expensive. I don't mind paying for them for items like their black bean burgers (even though I have a great recipe for black bean burgers) or their sausage patties or even their ribs. I had a WW leader suggest switching to meatless crumbles or at least half and half to reduce points in recipes. I started buying them, made the switch and the husband never noticed.

I saw on a blog a while ago (I have tried finding it again with no luck, so sorry for no credit!) how to make your own. I went right out and bought the TVP (textured vegetable protein) and tossed it in my pantry. Well that's where it has been since about May. This morning while pulling out some beans to soak I came across it and decided to rehydrate and season it and try to put in in at least one meal this week. I still haven't decided what that meal will be but I am thinking shepherds pie.

Here is the package. I bought it at Whole Foods for around $2.00. I have since seen it at the commissary and the regular grocery store. I know you can also buy it fairly cheap in bulk and some people can it for food storage.


Nutritional info here. If you can't read it, it is: 80 cal, 0 fat, 4 fiber for 1/4 c dry. This is 1 pt per serving.


I seasoned with a diced onion and some minced garlic.


I added 3 c of hot water with 1 1/2 T of beef base dissolved in it. (This won't change the points.) I let it sit about 10 minutes and then mixed it around. All of the water was absorbed.


On the package it gives directions for cooking in the microwave but I wanted it to have a browned look and taste so I tossed it in a pan sprayed with Pam and lightly browned it.


I packaged it up in 3 packages about 3 cups each. This looked like an equivalent to a pound of ground beef browned. I figure that it is 4 servings, each about 2/3 c. (if you are building a recipe in recipe builder it is 6 pts for the 4 servings (320 cal, 0 fat, 16 fiber). Once re-hydrated, it has to be refrigerated. I tossed mine in the freezer.


I'll post the results when I add it to a meal. It will be later in the week because tonight we are having Easy Chicken Tetrazini, a WW recipe from the tracker. It is one that I am looking forward to so I hope it turns out!

10.18.2009

Mexican Sausage Skillet

My little guy has been in the hospital and a good friend brought over dinner for us last night. So helpful and thoughtful. She is a great cook and I usually end up asking for her recipes. She knew that we would love this one and so she brought the recipe along with it. (She's awesome like that!)

It smelled amazing when I opened the lid! I had the forethought to take a picture before we started to dig in.


She is a Pampered Chef Consultant and the recipe was from one of the cookbooks. I don't know which one though. There is the Pampered Chef Chipotle Rub in it but I am sure you could substitute a similar chipotle spice. She is having a party next week and I plan on picking some up.

Mexican Sausage Skillet
4 servings
8 pts


1 c uncooked long grain white rice
2 ears corn, husks and silks removed
1 medium onion
8 oz smoked turkey sausage
2 garlic cloves, pressed
1 T Chipotle Rub (Pampered Chef)
2 cans 14.5 oz) diced tomatoes with green chilies
1 can black means, drained and rinsed
Fresh Cilantro and lime wedges (optional)

1. Cook rice.

2. Prepare and cook vegetables and sausage.
Meanwhile, remove corn kernels from cobs. Chop onion. Cut sausage into 1/2 in. slices. Lightly spray skillet with a nonstick cooking spray. Add corn to skillet in a single layer. Cook without stirring over medium heat 4-6 minutes or until caramelized on one side. Add onion, sausage, pressed garlic and rub; cook and stir 3-4 minutes or until onion is tender.

3. Finish and serve.
Add tomatoes and beans to skilled; bring to a boil. Serve bean mixture over rice; garnish with cilantro and lime wedges, if desired.

As you can see from the pictures she made it into a casserole. Again, it was so delicious. These are generous serving and this could easily feed 6 especially with a side salad. If feeding 6, it is 5 pts a serving.

You could easily use brown rice instead of white. I will probably make it with my cilantro lime rice. (Which I promise I will post soon.) I have pictures, I just need to pull the post together.)

10.17.2009

Oh, I Love Fall.....


And all the beautiful apples. I hit up the produce wholesale market and cam ehome with these beauties. I made homemade spice apples to can for pork dishes throughout the winter. I can't wait. I have a pork loin in the freeser just waiting to be topped!

10.01.2009

Back in the Kitchen

Sad to be posting these phone pictures, but they will have to do for now. It feels great to be back in the kitchen and making some healthy meals. As you can see, I have been disguising healthy options as junk food in the hopes that my husband will be happy and not complain about me counting.

Sloppy Joes, Lightened Up KFC Slaw, and Melon... 8 pts
(This slaw is amazing and I will post the recipe. So easy too!)


Skinny Wild Wings, Oven Crunch Fries, Veggie Sticks & Watermelon... 12pts
(Buffalo Wild Wings is my husband's favorite place. This was a great knockoff! Thanks Kristen for the idea!)


Steakhouse Surf and Turf (Small steak, 2 Jumbo Shrimp & 3 Bacon Wrapped Scallops), Almond Onion Rice & a Green Salad...
(This whole thing was only 11.5 pts!)


I am pretty proud that I have been able to come up with these things and my husband is more than thrilled to have me back in the kitchen. Tonight we are having Theme Park Turkey Legs, Seasoned Baked Potato Squares, Fridge Pickled Veggies & Apple Tarts (9 pts). (I have to take dinner to a family tomorrow night and I am testing the recipes.)

Recipes coming soon!

9.25.2009

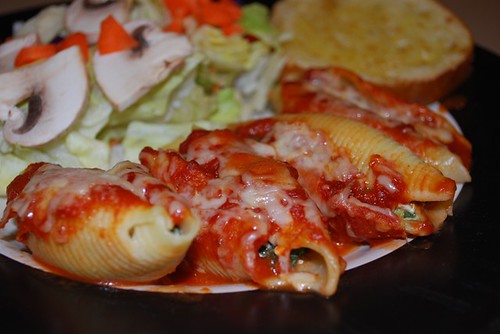
Spinach and Pizza Stuffed Shells and Garlic Toast

DSC_0378
***This is from last spring. Luckily, because I had already had a good start on the post, it came together easily. Seeing these pictures made my mouth drool, especially thinking about the pizza ones. Too bad we have long since polished these off. Otherwise, I know what we would be having for lunch.
By the way, the point values were actually one point lower than I posted on booth when I calcualted them, but they seem so sinful I upped them both by one. It just sits better with me and how I will be counting them.
These past few weeks were a mess. I wasn't making good food choices, I was eating too much, we were eating out a ton and I WAS HATING COOKING! I couldn't really figure out why but I think in hindsite, I was missing blogging. I usually have my camera in the kitchen and create a post in my head as I go, hoping it turns out good enough that I was to share with you. (This is not always the case, but oh well!) I had my parents in town and didn't want to be taking pictures
This was a dinner that I made quite a while ago and have been meaning to post. I had some of the leftover shells (Don't worry, they were from the freezer!) for lunch and they were delcious. I thought it was the perfect time to share.

Spinach Stuffed Shells
4 pts
Serving - 3 Shells

box of large pasta shells
2 c fat free cottage cheese
4 oz part skim mozzarella, shredded
1 egg (could use 2 egg whites)
2 T parmesan cheese
1/4 t salt
dash of pepper
1 T oregano
1/2 t minced garlic
10 oz. frozen spinach (thawed & drained)
3/4 c pasta sauce
1 oz finely shredded mozzarella for topping

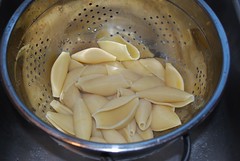
Cook shells according to package directions until al dente. Drain and set aside. I like to set them out on a cookie sheet so that they don't stick together or rip. Let cool enough to handle.
DSC_0348

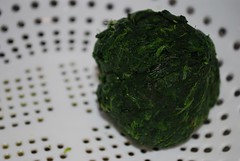
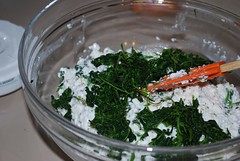
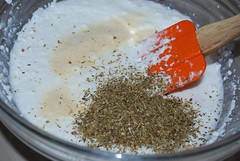
While noodles are boiling, combine cottage cheese, egg, garlic, salt, parmesan, mozzarella and oregano in a large bowl. Strain and press all the water out of the frozen spinach. (I wrap it in a paper towel and squeeze it to get out most of the water.) Add spinach to cottage cheese mixture. I use the whole package but it is a little on the "spinachy" side but I work under the theory "the more veggies the better." If you are nervous about the spinach only use 1/2.
DSC_0352 DSC_0349DSC_0354

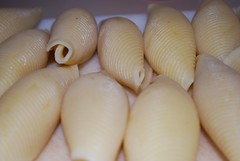
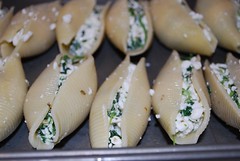
Man, isn't this pasta pretty. Make sure that you don't cook them too long or they get mushy. Stuff the shells with about 2 Tablespoons of the mixture. I stuff them just full enough that you can see the filling poking out but not so full that you run the risk of it oozing out everywhere.
DSC_0357 DSC_0361

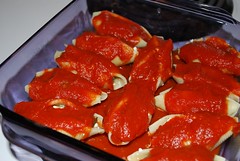
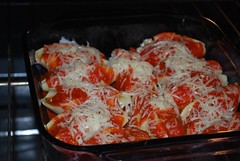
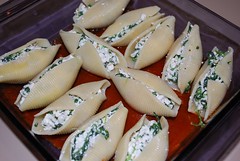
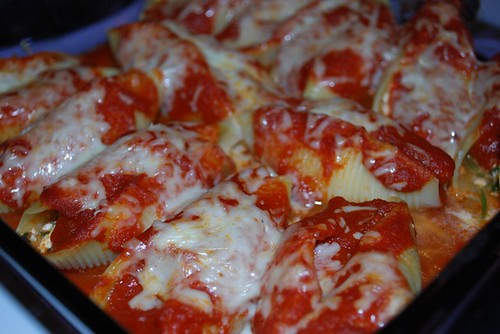
I use bottled sauce (usually Ragu Light) but you could use tomato sauce with some Italian spices in it too. Spread a thin layer of sauce on the bottom of Pyrex. Put shells in Pyrex. Spoon more sauce over the top. Sprinkle 1 oz of mozzarella on the top. I shred mine fine so that it goes a bit farther. Bake approx. 30 minutes at 350 degrees.

DSC_0356 DSC_0358
DSC_0363 DSC_0366

This made much more than pictured above. I stuffed at least 12 - 16 more shells and laid them in a single layer on a pan that fit in the freezer (no sauce!) and put them in a Ziploc after they freeze. Directions on how to do this are in the recipe below.

They came out so cheesy and delicious. I love that way that cottage cheese melts when you bake it. I am not a ricotta fan but you could use it instead if you prefer it or have it on hand.
DSC_0374

I served it with a salad and garlic toast. To make garlic toast I just take a thin slice of french bread and brush some olive oil and garlic on top. I broil it for a minute or two. I have to sit in front of the oven and watch it or else I forget about it. It will burn on you really fast. This was store bought bread but I have been working on french bread and made some today that was near perfect. I will be posting that soon. I have to be careful not to make it too often because I could easily polish off half a hot loaf.

DSC_0376

I had cooked the whole box of pasta shells and had a ton left and was looking for a way to use them. This is what I came up with. While I love the spinach stuffed shells, I have to admit that these are better. So delicious the best of pizza and cheese pasta all rolled into one.

Pizza Stuffed Shells
5 pts
Serving Size 3 shells

pasta shells (cooked according to package directions)
1/2 c diced white onion
1/2 c diced green pepper
1/2 c diced fresh mushrooms
12 large olives, diced
20 slices turkey pepperoni, diced
1 1/2 c cottage cheese
4 oz mozzarella, shredded
1/2 t minced garlic
1 t oregano or Italian seasoning
2 T parmesan cheese
3/4 c pasta sauce
1 oz mozzarella, finely shredded for topping

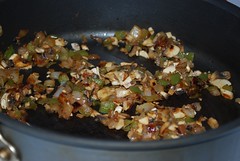
Sauté onions and green peppers and mushrooms in a pan with non-stick spray till soft.
DSC_0386

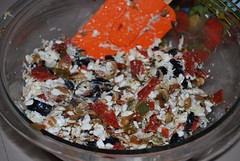
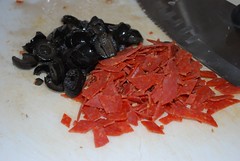
Mix cottage cheese, mozarella, parmesan, seasoning, egg and garlic together in a large bowl. Add chopped olives, pepperoni and onion mixture to cottage cheese mixture and mix together.

DSC_0388DSC_0389

DSC_0390

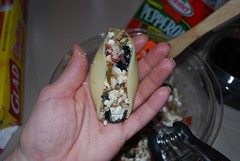
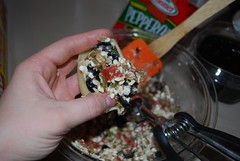
Stuffs shells with mixture. Shells should be full but not over-full.
DSC_0392 DSC_0393

If you were eating these immediately you would prepare with the pasta sauce as in the spinach recipe above. 350 degrees for 30 minutes.

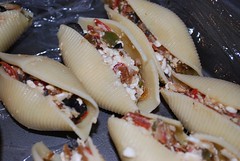
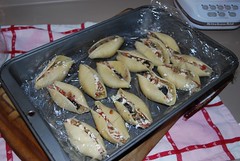
However, I made these to freeze for future use. After stuffing the shells, I placed them on a plan lined with plastic wrap and stick them in the freezer overnight. The plastic wrap keeps it from sticking to the pan. Once frozen through, I transferred them to a Ziploc bag. This way I could take out what I needed for dinner that night. So easy! And so delicious! Just add a little to the cooking time if cooking from frozen.
DSC_0394 DSC_0395

Between these two stuffings, I used all the shells. I had dinner for 4 or 5 nights for my little family.

Title: UNTITLED

I don't even know what to call these last few months. They weren't good. Dieting desparation, vacation pounds, a very drawn out kitchen remodel and very little cooking.

Obvioulsly, I never got around to posting that promised post. Sorry. Made a nice dinner last night, cedar plank salmon with roasted root vegetables. It was beautiful and would have made a great post and got me thinking about getting back to blogging.

Rather than make a mess of my kitchen, I am going to dig through old drafts and show you some ideas from spring that I never got around to posting. Maybe I can come up with something great for dinner. I know that my husband would love me back in the kitchen. As much as he complains about me counting points and always trying to lose weight, he is appreciative of a good meal.

4.16.2009

Hope...

I promise I have soemthing in the works. It is a rather lengthy post with two recipes and between the little girl (2 yrs) and the baby boy (6 months) blogging is getting harder to find time for. I have been doing it llittle by little and hope to finish tonight or tomorrow.

I hope!

4.10.2009

Thanks for Thinking of Me!


Thanks Connie!
Even though I have been MIA for a few weeks I was still thinking about this award and it made me excited to come back to blogging! Thank you, thank you thank you! I saw that Heather gave you one and I was excited for you!
I follow a way too many blogs and keep telling myself I need to cut back, but it is so hard when there are so many amazing ones out there. Because I have been separated from the computer for the past few weeks, I am going to catch up and post some of my favorite food ones and pass this award along this afternoon!
And now that I am back I have a few new posts in the works to bring my blog up to date!
Thanks again Connie!

3.10.2009

How to Peel and Egg & Ham and Egg Breakfast Sandwiches

DSC_0631

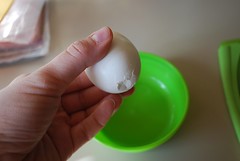
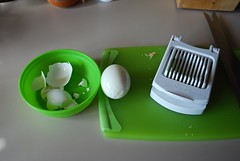
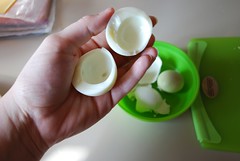
I follow a lot of "mom" blogs and one of favs is Design Mom. A white back, she had a post on "How to Peel an Egg" that really blew me away. Check it out! There is a video and it is pretty amazing. I decided to try it at home.

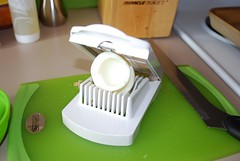
Boil the eggs at a slow boil for 12 minutes. Cool the eggs by throwing some ice in. In the video he says when you put the water in you put a 1/2 teaspoon on baking soda in and it raises the pH thus reducing the adhering of the egg to the shell. OK, I have to admit that I didn't really know if you boiled it with the baking soda (which is what I did) or if you add it after. I guess I could have done some more research. He cracks and peels a small hole in the top and bottom of the egg and blows it out of its shell. No, I couldn't blow the egg out when I tried it but the shell did come off easily without taking any of the while with it. To my skack and awe, the egg came out perfectly, no pocks where I had gouged the white. This was a first. (My husband makes fun of how bad eggs look after I usually peel them.) Its worth a try and a fun experiment.

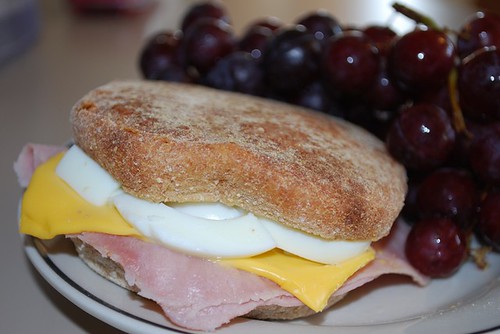
So after experimenting, I had to put the eggs to work. I decided on a super easy breakfast sandwich. We make these sandwiches all the time with scrambled eggs but after trying them this way, I am converted to hard boiled.

Ham and Egg Breakfast Sandwich
4 pts
Serves 1

high fiber English muffin (1 pt)
1 slice of lean ham or canadian bacon
FF or 2% american cheese slice
1 boiled egg

Peel egg (per instructions above). Split and remove yolk. Disgard yolk. Slice egg white and lightly salt.
DSC_0617DSC_0618DSC_0620DSC_0621

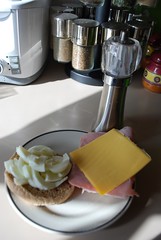
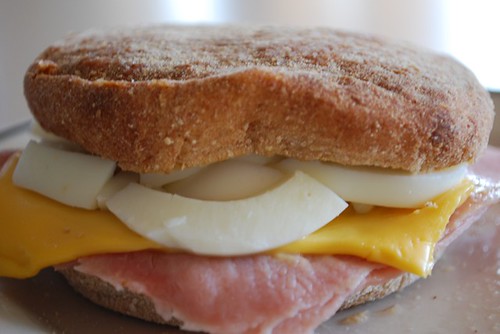
Split and toast Enlish muffin. Place slice ham, cheese and egg on the muffin.

DSC_0626

Put two halves of muffin together and enjoy! You can boil a bunch of eggs at once for a fast breakfast. Just warm the egg white for a few seconds (under 10) for a quick morning meal.

DSC_0630

3.09.2009

Peach Pie Smoothie - 3 pts

DSC_0397

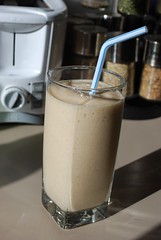
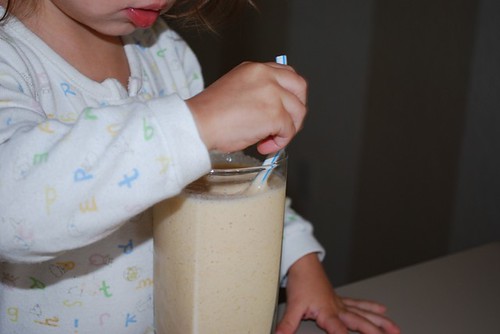
A few weekends ago, I was watching Food Network while feeding the baby boy. Ellie Krieger was on. If you are not familiar with her, she has a healthy cooking show and is a nutritionist and registered dietician. She always has some good tips for getting maximum nutrition out of your food. In this episode, she made a delicious looking peach smoothie. I had the ingrediants for it so I thought I would try it out for breakfast with a few alterations to the recipe. I really was pleased with the results and so was the little girl. I had to talk her into sharing with me because she was determined to keep it to herself.

Peach Pie Smoothie
3 pts
1 serving

Here is the original recipe via FoodNetwork.com.

And here is mine.

1/2 c skim milk
6 oz Weight Watchers Amerretto Cheese Cake Yogurt
1 c frozen peaches
1 T Splenda
1/4 t vanilla
1/8 t cinnamon
pinch nutmeg
pinch ginger

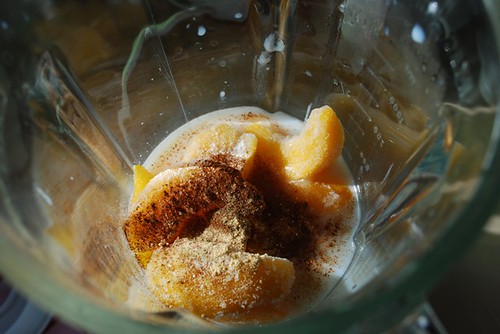
Put all ingredient in blender and blend till smooth.

DSC_0396

DSC_0400

DSC_0402

Low in points for a large shake and a great source of calcium and vitamin C. 1 1/2 milk credits and a fruit. And kid approved! What can get better than that!

DSC_0403

3.07.2009

2 Point Cupcake

DSC_0013 (2)

After my binge this week and enjoying a couple of full point regular cupcakes at a birthday luncheon, I thought I would post a better alternative (or what I should have eaten instead).


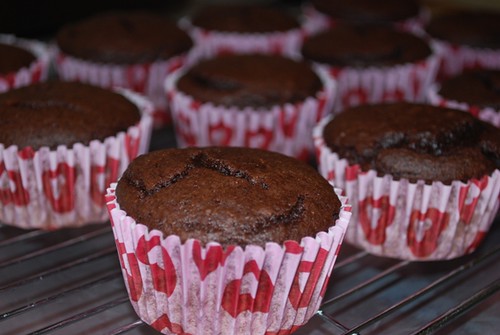
These are 2 pt cupcakes, 3 with frosting. I think that a lot of people at WW call them a 1 pt cupcake but when I plug them into the recipe builder, they come out 2 so I am trusting that. They are super duper easy and taste great. They are good enough to be served at a party. I did at my daughter Valentines party this year and everybody loved them.


2 Point Cupcake
Serves 24

1 cake mix
2 egg whites
1 can of diet soda

Combine all ingredients. Fill lined cupcake tins 2/3 full. Bake time and temperature according to cake mix package directions.

Frosting
1 point

16 oz Cool Whip Free, thawed
1 4 serving pack of sugar free pudding mix (not prepared)

Pour powder into thawed Cool Whip and mix. You can also tint with color. Store in fridge.

You can really do any flavor combo that you like. I did a chocolate mix with diet cherry coke for the cake and then vanilla pudding in the frosting because I was tinting the frosting pink.

I was thinking that carrot cake with diet cream soda and sugar free cheesecake pudding would be delicious. I also have some diet peach soda right now and think that it would be great with a white cake mix and pain cool whip and fresh peaches on top. My mom just found out that she has diabetes and they are going to be visiting around the time of my dad's birthday. I am planning on making a reduced sugar cake mix this way and using sugar free Cool Whip in the frosting.

I made 12 cupcakes. I realized that I didn't take any pictures of the cupcakes that didn't have the kids int hem until after they were gone. Too bad because they were adorable. I melted 2 mini candy canes together into the shape of a heart as a topper. They were perfect for the party.

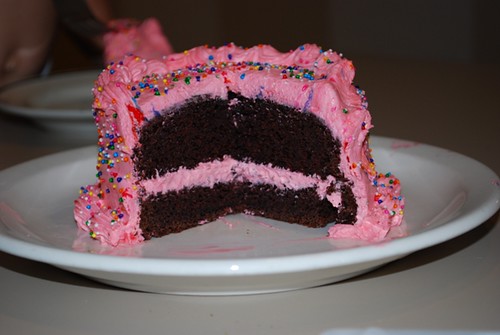
With the other half of the batter, I made this mini cake for my daughters birthday. It turned out adorable and it was the perfect size for a small family. We cut it into 8 small slices.
DSC_0067

DSC_0080 (2)

I have to admit that I have a weakness for cake and could do some real damage with cake sitting around so this recipe is going to be saved for special occassions. It is wonderful to have an easy way to lighten up a celebration staple because I am usually consuming more than my share of points at the party with other things. It is nice to shave off a few on the cake.